background wallpaper

Sunday, January 26, 2014

Sewing for family

I got some exciting news my BFF / Cousin is getting two piggies for my niece. After a visit she had with my piggies last month she has been begging my cousin for piggies of her own.  So of course I am compelled to share my fleece loving sewing obsession on my family! My plan is to make her two sets of coordinating cage pads, lap pads, tunnels, and bottle pads etc. I shopped last week and picked up some adorable purple unicorn fleece and a couple of coordinating stripes, stars and blue chevron patterns.  I'm trying not to go too overboard, I want to make sure my Cousin likes using fleece in the cage. Plus I am sure she would like to get a little crafty and make a couple of things herself.

I'm super stoked I have these projects to do, I am running out of storage space for all the projects I make for my pigs!  I might have to donate some of it.  Every once in a while I consider marketing and selling as a side business but I have done the whole turn your hobby into a business thing before and I   am not sure I want to do that. Not that I don't have enough hobbies LOL

So this is what I managed to sew up today, I have a lot more fleece to work with so I am not sure what the final package will look like for my cousin, I just know there will be at least two sets of everything.

I know at least the two unicorn fleeces are definitely going to my niece.
(Unicorn/Rainbow stripe reversible fleece tunne and 
Blue Chevron/ Unicorn reversible waterproof lap pad)

Here's the four projects I completed today
Two fat quarter size reversible fleece waterproof lap/cage pads:

Two reversible fleece tunnels, one with batting, one with uhaul pad 
(first and last time trying uhaul as the batting. I broke THREE needles 
and had to hand finish sewing over the seams!)


Wednesday, January 22, 2014

"Sew" productive

When I sew, I try to do several projects and get as much bang for my buck as I can.  My sewing time is limited and I am not exactly the best or most patient sewer but my piggies told me they don't mind my sewing, they will pee on my wonky stitched fleece all the same. 

Here was the products of last weekends sewing session: 


Two ramp liners

Two catwalk liners

One reversible no sew fleece bed

Two tree catwalk liners

These are really neat. I used my Invertible Stuff-able Pillow case liner sewing technique to make these catwalk pads. They have two layers of uhaul padding sewn inside them and are able to be inverted for quicker drying and stuff0able if you need to add more padding or a coroplast panel inside.

Here are several of my past sewing projects:

Where the wild things are tunnels

Free standing Forest fleece fleece forest and hay bag

 Cage liners, corner pads, potty pads

Waterproof bottle pads, patio liners

another Wild thing tunnel

Assorted tunnels, costs, beds, and pads

 Close ups of pad and cosys

Heart shaped bed and storybook tunnel

Chevron waterproof pads

 Brown chevron cage liner and waterproof pads


Guinea TV grid hidey cover

Catwalks!

I still liked the idea of the racetrack upper level but the tubes were getting to be a hack to clean so I thought I'd see how I liked a gridded catwalk instead.  True to it's name my cat had to investigate soon after I installed it:


The piggies seem to prefer the catwalks to the tubes, they are flat, wider and plusher.


I finished switching out the tubes for catwalks last week.  I really like them.  They are super easy to clean (much more budget friendly for anyone who wants to try this in their cage) and although the cage looks like it would be complicated and time consuming to take apart it is incredibly fast!  Both patios, the ramp and one catwalk are all able to come up and out of the cage.  The one catwalk in the back had to be permanent because of the lid but it is very easy to work around.


One small challenge I came across is that my foxy tube liners were too narrow for the much wider catwalks so I quickly sewed up a couple of wider cat walk liner sets.


Piggy cage gets tubular.

I stumbled on a really cool cage using clear acrylic tubes and PVC on the outside of the cage to create a habitrail style racetrack.  As soon as I saw it I got obsessed with the idea of adding one to my cage.  I bought a 6" diameter, 6' acrylic tube from www.usplastics.com and had them cut it into two 3' sections.  After giving it some more thought I realized It would cost less if I didn't put the tubes on the outside of the cage.  I brainstormed a few different ideas and then decide to do a trial run with one tube connecting to a second patio. I wanted to see how difficult it would be to maintain.  

The piggies loved it and it worked well and looked super cool:


It wasn't very long until I decided to complete the racetrack and add the second tube:
 I had it like this for a couple of weeks but soon got tired of cleaning out the tubes. They are big enough to put an arm in, but they get messy on the insides and while it does look super cool and work great, I just didn't feel like I wanted to keep maintaining it.   My next variation on this idea was to swap out the tubes for a set of U bent grid catwalks.  See my next post for photos and details.


Tuesday, January 21, 2014

All lit up

Here's the cage with the lights on. Snazzy huh?


Winter is Coming... Brrr...

When I started thinking up different holiday fleece themes for the cage I was originally going to go with something Christmasy. After giving it some more thought I realized that December 26th my Christmasy themed fleece was going to have to go away until next year so I chose instead to do something wintery.  I picked out Winter Raccoon fleece and a Marshal Ferret blue igloo. I added some tube lights, which I plan to keep up until they no longer work because piggy lights are awesome all year long.  


 mmm.... peppers.

I even topped their wood pellets with some nice soft white care fresh "snow". 
I learned something this day.  I don't like care fresh. Dare I say I loath the stuff?
It gets smelly, tracks ALL OVER THE PLACE and like real snow, not so pretty when it's yellow. 

Here is Margo enjoying it though:
   (A quick disclaimer: ALWAYS cover your ramps, it is very dangerous for them to climb bare wire, they could break a leg. I took it out for the photos so you could see them better and then the ramp liner went back in)

 Then again she will plop down just about anywhere. Isn't she GORGEOUS!!


Marshal ferret blue igloo hidey, not my favorite. They loved it, especially Agnes, 
but the removable floor got peed all over so I ended up taking it off. 
Then she would flip it and turn it into a cage and pee on the side.  

 I added some removable vinyl snowflakes I got on ebay to the cage.  BIG MISTAKE these things are a real pain to remove.  If you want to put in removable decals stick with the peel and stick kind. Avoid the ones you have to smooth on with a credit card.  I'm still peeling off snowflakes!  
I have very little patience. 


Kitchen expansion and Plexiglass viewing windows!

Probably one of my all time favorite cage modifications I have ever done was adding plexiglass viewing windows to the cage.  There are actually FOUR different windows in this cage design. The two main ones are easiest to see.  

Can you spot the plexi windows?
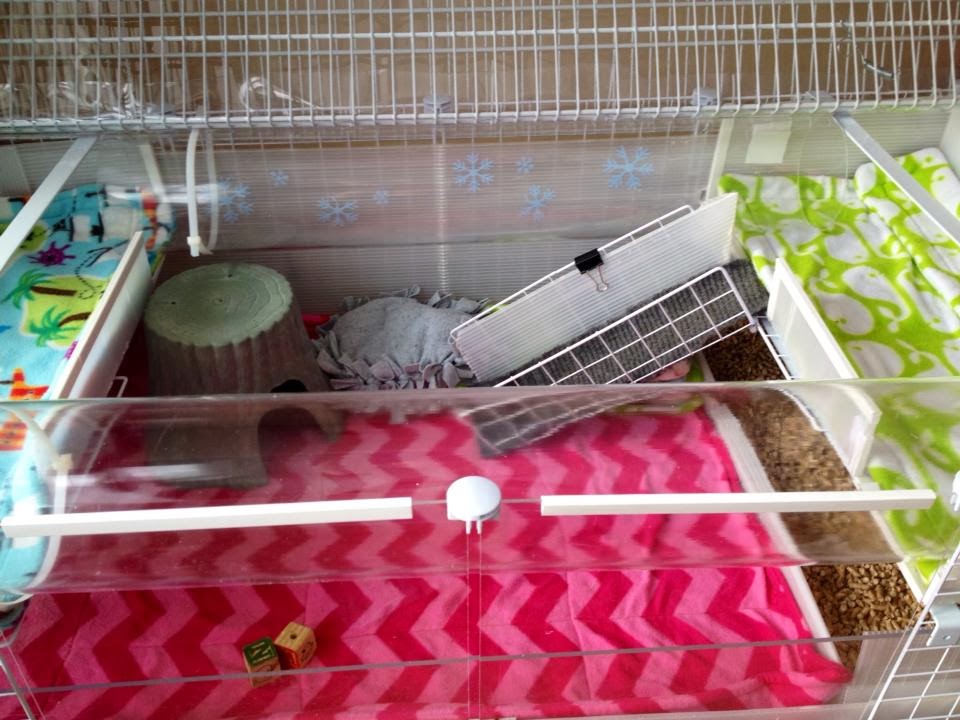
 -Two grid replacement windows in the middle front (thats the easiest one to find).
- One loooong viewing window built into the main coroplast tray, so while it might appear my coroplast try is only 2" high in the front of my cage, it's really 6" high all the way around.  I cut out most of the front coroplast and then installed a plexiglass window using velcro inside the tray. I left a small lip on the front and 6" square on each side to mount the velcro to.  If you look really close in some of these photos you will see the second window at the bottom of my tray.
- yet another window is cut into the front wall of my kitchen.  I made this one the same way as the larger window in my coroplast.  Next time I take it out of the cage I will get some close ups to show you. 

I bought my plexiglass panels precut from tap plastics 
( http://www.tapplastics.com/product/plastics/cut_to_size_plastic/acrylic_sheets_clear/508 )

My grid windows fit inside my connectors. If you want to do this you need 1/8" thick plexiglass (acrylic) cut to the size of your grids. Mine are 14" x 14" You could choose to do the whole front of your cage this way.  If you don't need them to fit inside the connectors go up to at least 3/16" thicker or more.  The thicker the better.  I choose to do my windows this way because if I scratched or damaged the windows I wanted to be able to replace them cheaply and easily.  I also wanted to use the connectors so there is more airflow in the cage. 


Here's my little cuties all grown up. Awe!

I tried expanding my kitchen for a while. Remember that 2x2 quarantine cage I showed you, this was the tray for it. I modified it, cut it down to a 1.5x2 and added the front plexiglass viewing window.


The nice part about the bigger kitchen is my 2x3 fleece fit in with some room to spare. The downside, even with 3 pigs in there, they weren't really soiling the whole thing so I decide to go back to a 1x2 kitchen.

 You can see the viewing window in the front of the kitchen here.  So what you are looking 
at right next to Mabeline is actually THREE layers of plexiglass right there!


 All this fun stuff and the cage is still only one grid high